 |
Fraxinus
18.10
An IGT application
|
|
Fraxinus
18.10
An IGT application
|
In order to view two volumes in relation to each other, they have to be image registered.
Image landmark registration is a simple process where a number of points (landmarks) are defined on the same locations in two volumes. The landmarks are then matched by an algorithm, and the volumes are thus registered. The two volumes are called fixed and moving in the registration process.
Before performing an image registration, you must determine which landmarks you want to use. They should be clearly identifiable anatomical points, alternatively artificial fiducials can be attached to the patient prior to image acquisition. 4 landmarks are the minimum recommended.
Registration Methods Widget, Landmark Tab, Image Tab.Add to store the selection position as a new landmark. Give it a unique name if needed.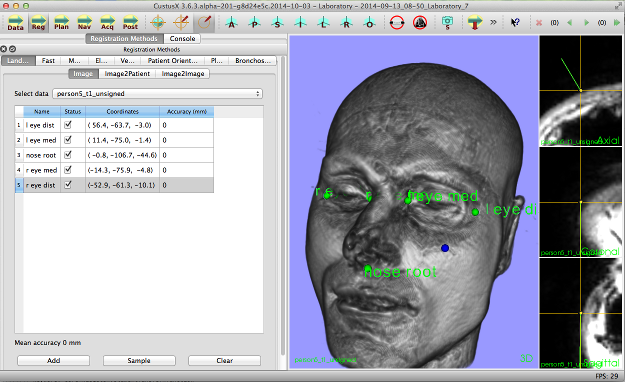
Sample to store the coordinate information. The landmarks now holds two coordinates, one for the moving and one for the fixed volume.Registration History Widget to move back and forth in time if you need that.  1.8.11
