CustusX can be used to record images from an ultrasound probe, and create 3D volumes based on this recording.
This tutorial assumes:
- The Video Source is connected and streaming ultrasound data.
- The US Probe is calibrated and configured. Thus must currently be done with help from SINTEF engineers.
- The US Probe is tracking.
As a visual check, you can view the probe in the 3D scene and verify that the video is attached to it, as shown in Illustration 6 (the background color can be changed in Preferences->Visualization):
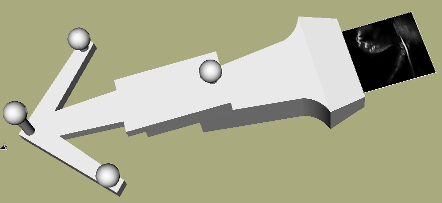
US Probe with streaming attached
The Video View should also display a yellow line around the ultrasound part of the video image.
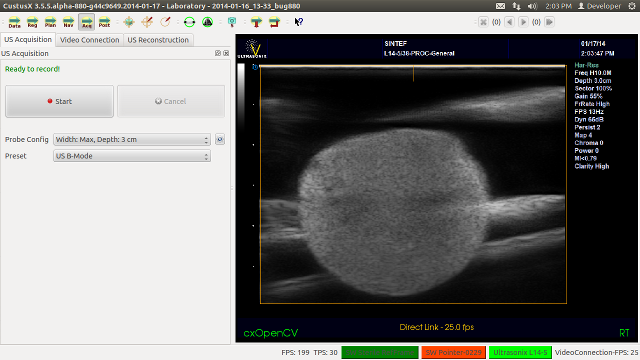
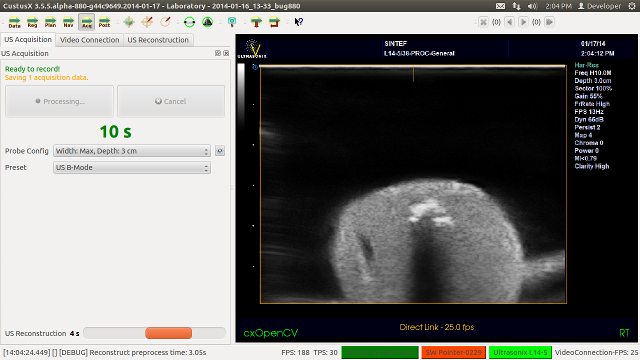
US Acquisition before start. The Ultrasonix L14-5 probe is active and ready to record. The ultrasound area is indicated by a yellow box
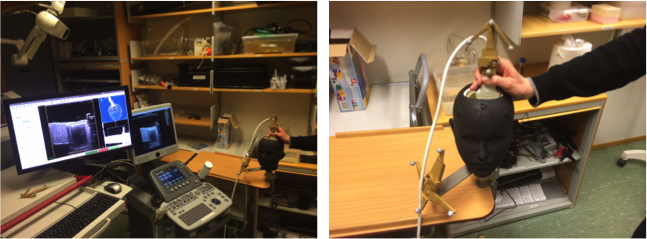
US Acquisition in the lab, using an Ultrasonix scanner and a neurology phantom
- Go to the Acquisition Workflow Step.
- Open the US Acquisition Widget. You should see something like the figure above.
- Verify that the yellow box correctly encompasses the ultrasound sector in the video. If not, change the Probe Config to one matching the current settings on your scanner. CustusX does not have direct access to settings on the scanner in this configuration, thus you must apply them explicitly. CustusX also has direct integration with some scanner brands, this is not covered here.
- If the yellow box still is not correct, the probe configuration file (ProbeCalibConfigs.xml) does not match the settings on the scanner. Change scanner settings/screen setup or reconfigure probe configuration file.
- Get ready to record by placing the US Probe in the starting position.
- Press Start.
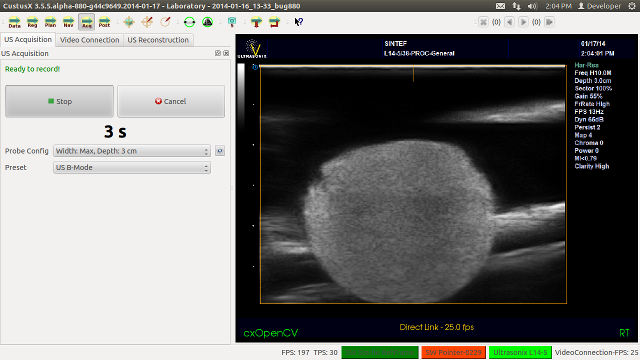
US Acquisition running
- Move the probe over the volume of interest. This can be visualized in a 3D view if you have some preoperative data. Try adding an Anyplane clipper to see the slicing better.
- Press Stop when you are done.
- Ultrasound reconstruction should now start automatically. This is indicated by a progress bar. Check out the console for more information about the progress. If you do not want reconstruction to start automatically after acquisition, go to Preferences->Automation and turn it off.
Data being reconstructed into 3D volume
- When reconstruction is finished, the volume becomes available in the right-click menu in the views.
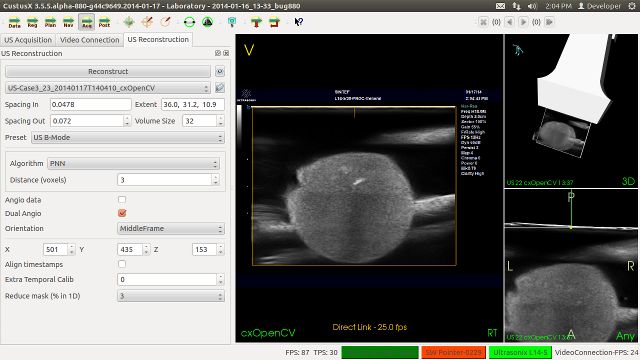
The Reconstruction Widget
For more control over the reconstruction process, open the Reconstruction Widget.
- Select the raw data acquired during the US Acquisition step in the drop-down list at the top. You can also browse to a location.
- Lots of fine-tuning stuff: Use the defaults if on doubt.
- Volume Size: Select size of output volume. A large volume increases resolution, but increases processing time and memory usage. It is unnecessary to increase the size so that the output spacing gets lower than the input spacing.
- Select Algorithm:
PNN is the default, and the simplest. Other algorithms are faster and better, but more experimental.
- Press
Reconstruct to start reconstruction. This is exactly the same operation as when reconstructing from the US Acquisition Widget.
The reconstruction widget

 1.8.11
