 |
NorMIT-nav
16.5
An IGT application
|
|
NorMIT-nav
16.5
An IGT application
|
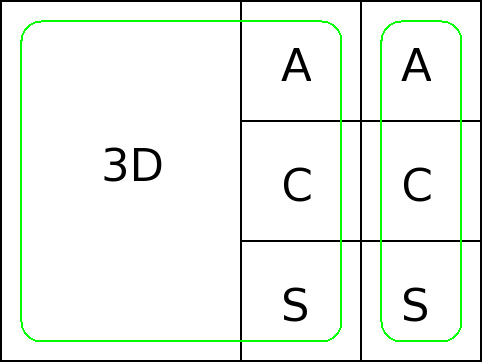
Select various layouts that display data in different ways.
Layout->3D AnyDual.Layout->3D.Layout->3D ACS.The layout changes between different modes. The difference between them is how the 2D and 3D views are combined to visualize data. The concept of View Groups are important here. Each group of Views show the same data.
As an example, we display two groups containing different data, 3D+ACS and ACS.
Group 1 displays only the MR volume.
3D+ACS, ACS | 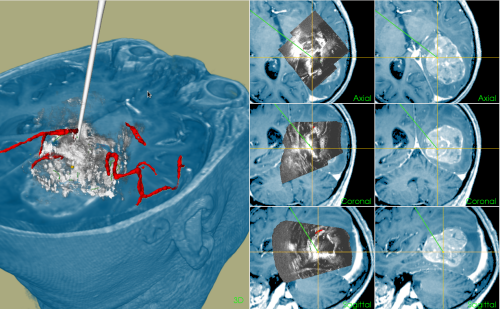
Rendering |
In addition to the predefined layouts, custom ones can be created in Layouts->New Layout.
The use of CustusX during a surgical procedure can be broken down into a series of steps:
This is the main workflow. Each step is named a Workflow Step. They are controlled from the toolbar, highlighted in the figure.
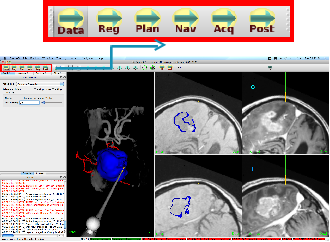
Each step contains its own widget and layout configuration. In addition, the configuration can be customized by the user and stored for later use. Use WorkFlow->Save Desktop to store, and WorkFlow->Reset Desktop to go back to the default for that step.
Several features can be fine-tuned in the preferences widget.
 1.8.6
1.8.6 
