 |
CustusX
18.04
An IGT application
|
|
CustusX
18.04
An IGT application
|
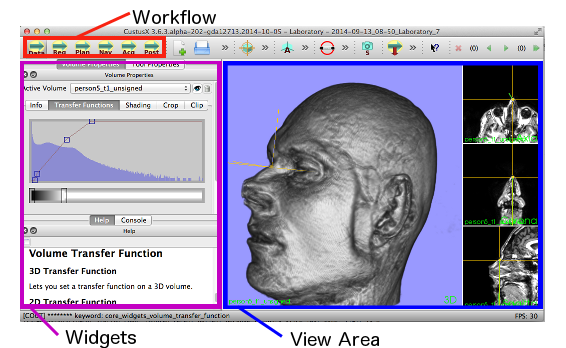
The main window present the main features of CustusX. The View Area display visualizations of volumes and models, and is the most important part of the system. Everything else is support. The Widgets are windows that contain functionality of all kinds. They are usually placed to the left, but can be dragged to all sides if needed. The Toolbar on top contains shortcuts to important functions. The most important is the Workflow Buttons, which can be used to change the main window to a specific state. The Menu (not shown in the image) also contains important functions.
The view area consist of several Views, each of which can visualize either 2D, 3D or video data. The 2D views show data in either Saggital, Axial, Coronal or in a plane defined by the active tool. Each View belong to a View Group, and all Views in a View Group display the same data.
As an example, we display two groups containing different data, 3D+ACS and ACS.
Group 1 displays only the MR volume.
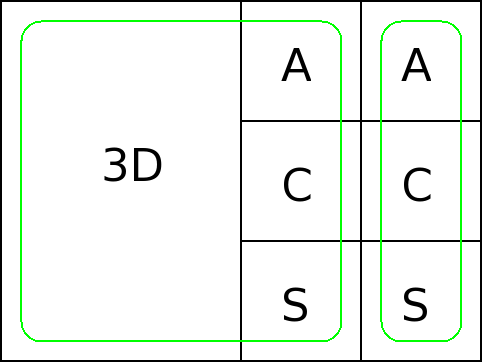
3D+ACS, ACS | 
Rendering |
Right-click on a view to control which data are visualized there.
Change layout from Menu->Layouts. In addition to the predefined layouts, custom ones can be created in Layouts->New Layout.
It is possible to visualize overlayed volumes in 2D. Use the Slice Properties Widget to control this fully.
Widgets contains the bulk of functionality in CustusX, and more can be added by the use of Plugins. Show a Widget by selecting Menu->Window, or simply right-clicking on the title bar of an existing Widget.
All specific widgets are described here:
The use of CustusX during a surgical procedure can be broken down into a series of steps:
This is the main workflow. Each step is named a Workflow Step. They are controlled from the toolbar:

Each step contains its own widget and layout configuration, i.e. the step stores the setup that you have on screen. In addition, the configuration can be customized by the user and stored for later use. Use WorkFlow->Save Desktop to store, and WorkFlow->Reset Desktop to go back to the default for that step.

Several features can be fine-tuned in the preferences widget.
 1.8.11
